
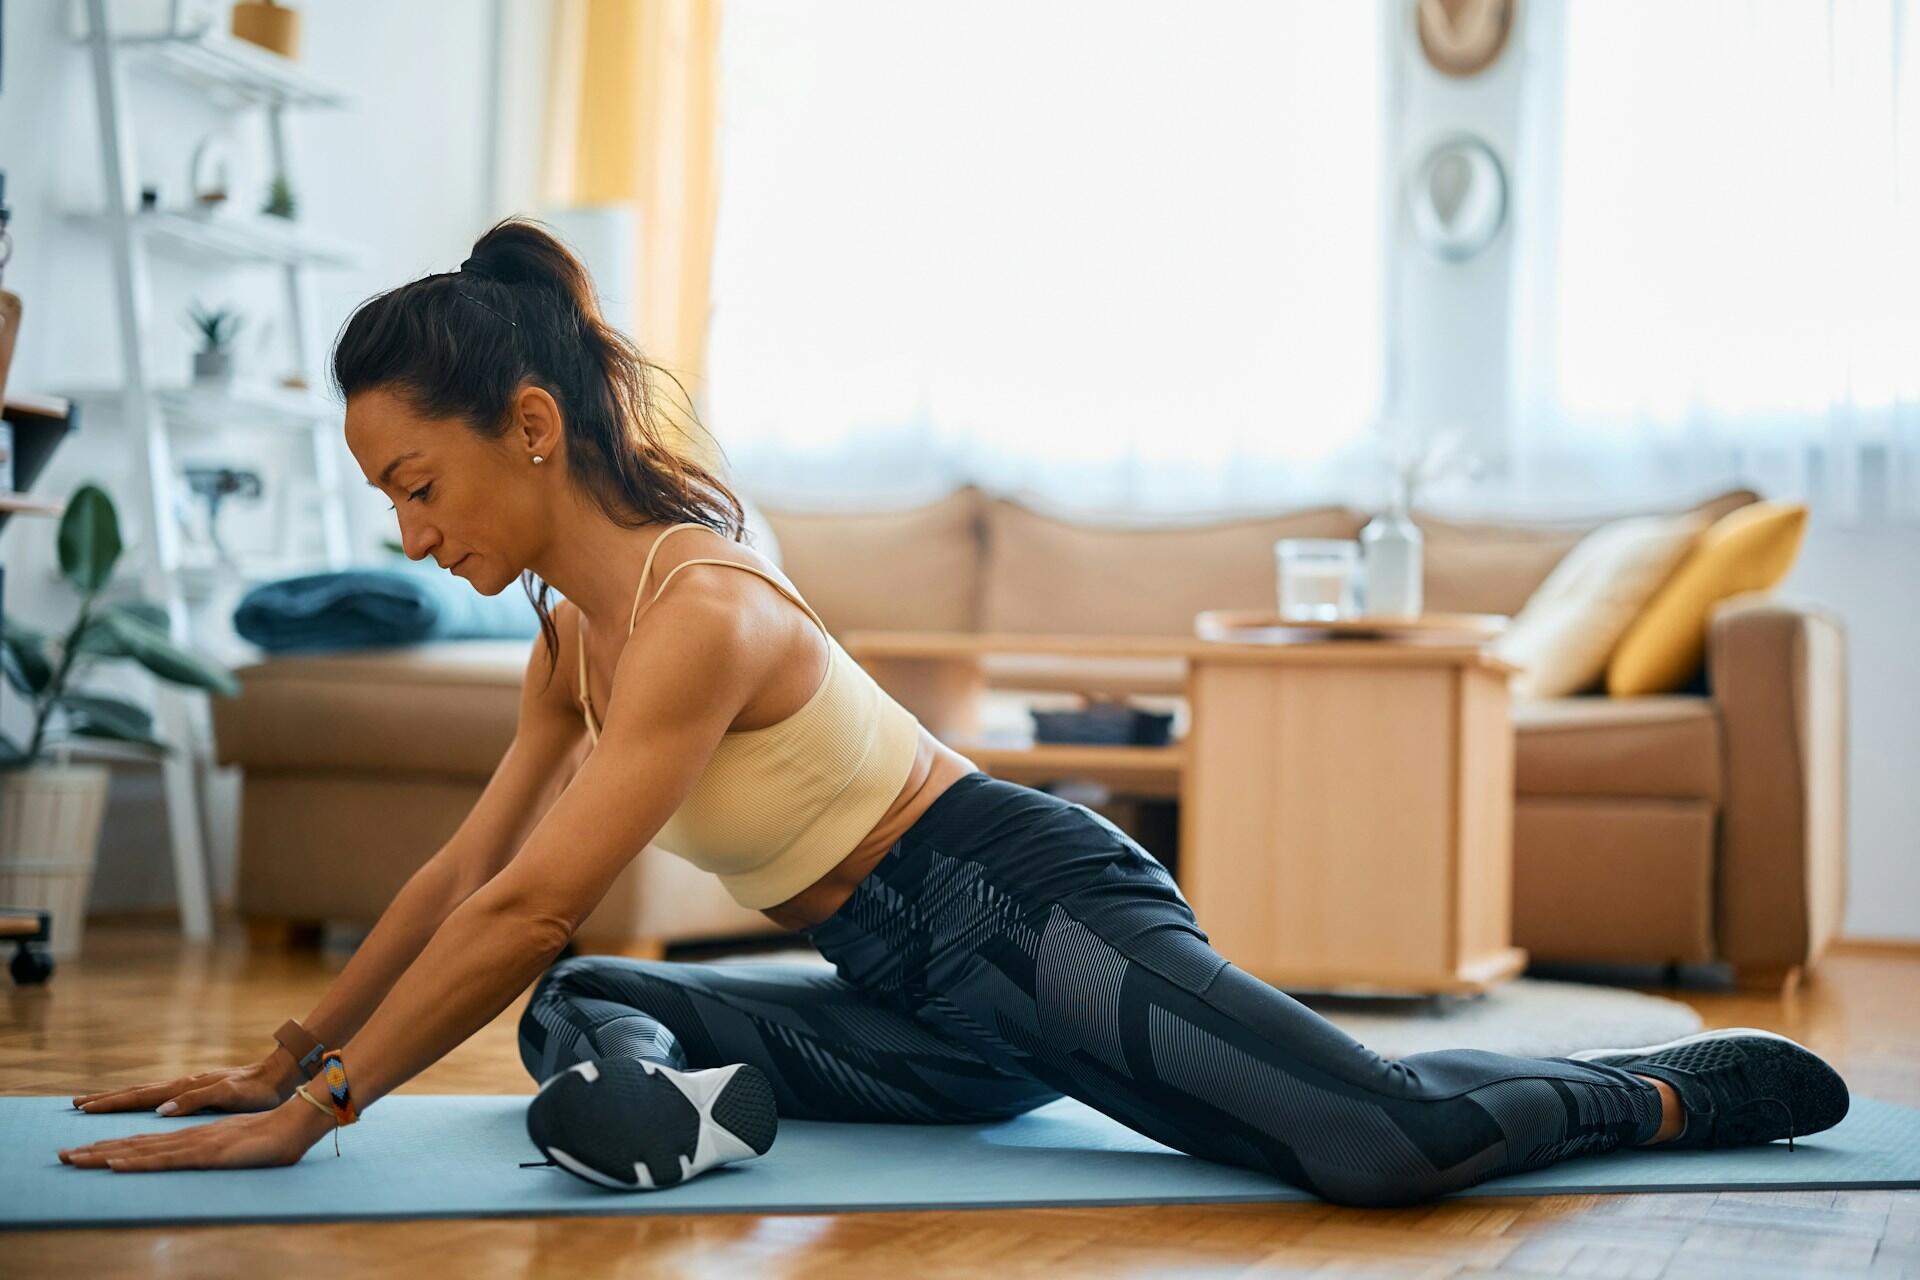

One-Legged King Pigeon Pose, or Eka Pada Rajakapotasana, is a deep hip opener and backbend. You sit with one leg bent in front and the other stretched behind you, then lift your chest. In the full pose, you bend the back knee and hold that foot with both hands overhead.
Few people reach the full version quickly, and that’s fine. Props and simpler variations bring most of the benefits within reach much sooner. Here are the steps, the safest modifications, and who should adapt the pose.
Breaths: how long Kathryn Budig holds the full pose
8in her step-by-step guide for Yoga Journal


What Is King Pigeon?
King Pigeon is a seated pose that works your two hips in opposite ways. The front hip bends and turns out, while the back hip opens into extension. Iyengar teacher John Schumacher notes that this mix is unusual in backbends.
Yoga teacher Natasha Rizopoulos explains that most hip openers do one of two jobs. Some turn the thighbone outward in the hip socket, and others lengthen the psoas, a key hip flexor. This pose does both at once.
At a glance
The Pose in Brief
| Detail | One-Legged King Pigeon |
|---|---|
| Sanskrit name | Eka Pada Rajakapotasana |
| Pronunciation | aa-KAH pah-DAH rah-JAH-cop-poh-TAHS-anna |
| Pose type | Hip opener and backbend |
| Level | Advanced in its full form; simpler variations suit most students |
| Front leg | Hip flexed and turned out: stretches the outer hip and buttock |
| Back leg | Hip extended: stretches the psoas and quadriceps |
| Props (optional) | Folded blanket or bolster, blocks, yoga strap |
Based on Yoga Journal pose guides and Iyengar teacher John Schumacher, checked Oct 1, 2026. Full references in the Sources section.
Teacher Kathryn Budig finds it funny that such a graceful pose is named after a street bird. Yoga Journal also uses the name One-footed King Pigeon. In her guide, she invites students to open the chest like a bird’s breast.

The pose shown here is the last stage of a long progression. Every stage before it is a useful pose in its own right.
What Are the Benefits of King Pigeon?
King Pigeon stretches both legs, the hips, and the whole front of the body. As a backbend, it also strengthens the muscles of the back. Yoga Journal lists these main benefits.
- Opens the hips: stretches the thighs, inner hips, and buttocks in different ways in each leg.
- Lengthens the hip flexors: reaches the deep psoas and the quadriceps of the back leg.
- Opens the front body: stretches the throat, chest, and abdomen.
- Builds back strength: works the back muscles that hold the arch.
- Eases movement: open hips can improve range of motion and make seated postures more comfortable.
Rizopoulos points out that the psoas gets chronically shortened in “our chair-bound society.” That makes this stretch especially welcome after long days at a desk. Practiced with steady breath, she adds, Pigeon can promote calmness and clarity.
Approach this pose thoughtfully and consciously—it’s an intense stretch that requires precise alignment.
Natasha Rizopoulos, senior teacher at Down Under School of Yoga, in Yoga Journal

Backbends like Cobra prepare the spine for that work. Yoga Journal lists Cobra among the warm-ups for the deeper version of King Pigeon.
How Do You Do One-Legged King Pigeon Pose?
You build the pose in stages: set up Pigeon, square the hips, lift the chest, then catch the back foot. Stop at whichever stage keeps your breath smooth. Each step below starts with the right leg in front.
Step by step
From Pigeon to the Full Pose
| Stage | What you do | Key focus |
|---|---|---|
| 1. Set the base | Front shin angled under you, back leg straight behind the hip | Back leg in line with the hip |
| 2. Square up | Draw the back-leg hip point forward; prop the front hip if it floats | Hips level |
| 3. Lift | Fingertips beside your hips, chest up, tailbone down | Long lower back |
| 4. Catch | Bend the back knee and hold the foot or a strap, one hand at a time | Elbows toward the ceiling |
| 5. Release | Let go one hand at a time, then switch sides | No sudden drop |
Adapted from Yoga Journal’s instructions and John Schumacher’s Iyengar method, checked Oct 1, 2026.
Step One: Build the Base
Start on your hands and knees, or in Downward-Facing Dog Pose. Slide your right knee forward and angle your right shin under your torso. Your right foot sits near your left knee, and the outside of your right shin rests on the floor.
Slide your left leg straight back, resting the top of the thigh on the floor. Look back to check that it extends straight from your hip. Your right knee can angle slightly out to the right.
Step Two: Square and Support the Hips
Draw your left hip point slightly forward, so both hip points face the front of the mat. If your right hip floats off the floor, slide a thickly folded blanket under it. Flex your front foot to help protect the knee.
Jason Crandell suggests propping the whole front leg, not only the hip. Place a bolster under the hip, thigh, and knee, or one block under the sitting bone and one near the knee.
Step Three: Lift Into the Backbend
Press your fingertips into the floor beside your hips. Lengthen your lower back by taking your tailbone down and forward. Then lift your chest and draw your shoulder blades into your back.
Step Four: Catch the Back Foot
Bend your left knee to bring the foot up. Schumacher teaches catching it with the opposite hand first, here the right, to keep the pelvis balanced. Turn that elbow forward and up until it points at the ceiling.
Next, reach your left arm overhead and take the foot or strap with that hand too. Lift your chest and let your head move back toward your foot. Keep your neck relaxed, and stay for a few steady breaths.
Step Five: Come Out Slowly
Let go one hand at a time, since a sudden release can jar your spine. Place your hands on the floor, lift your hips, and slide your legs out. Then repeat with the left leg in front.
beenhereListen to your kneeEase off or come out of the pose if you feel pain in your knee or hip, or any numbness or tingling. Progress here comes over weeks and months, not in one session.
Modifications and Variations for Every Level
The full pose is a long-term goal for most students, and the variations deliver much of its value now. Pick the version that matches your hips, knees, and shoulders today.
Modifications
King Pigeon Variations and Props
| Variation | How it works | Best for |
|---|---|---|
| Reclined figure four | Lie on your back, cross one ankle over the other knee, and draw the leg in with a strap | Sensitive knees, beginners |
| Seated Pigeon | Sit with knees bent, cross one ankle over the other thigh, and lean on your hands | Hip opening with little load |
| Forward-fold Pigeon | From the base pose, lower your torso over the front leg | Resting the hips; skip it if your knee complains |
| Upright King Pigeon | Keep the back leg straight and the chest lifted on your fingertips | Building the backbend |
| King Pigeon with props | Blanket or bolster under the front hip and thigh, strap around the back foot | Tight hips, quads, or shoulders |
| Pose II | Front foot planted, back knee bent, both hands hold the back foot | Experienced students |
Variations described by Yoga Journal and Jason Crandell, checked Oct 1, 2026.
A strap is the most useful tool for the backbend. Loop it snugly around the arch of your back foot, then hold the tail with both hands. Walk your hands down the strap only as far as your chest can stay lifted.
Be careful with the forward-fold version, too. Rizopoulos warns that sinking into it without attention can stress the knee and the sacrum. Open your hips gradually with gentler variations first.
Poses to Practice Before and After
Warm up your hip flexors, outer hips, spine, and shoulders before you try the backbend. Crandell recommends a full backbending sequence with Pigeon near the end. These poses come from Yoga Journal’s and Crandell’s preparation lists.
- Low Lunge Pose (Anjaneyasana) stretches the hip flexors and quads.
- Bound Angle Pose (Baddha Konasana) opens the hips outward.
- the Bridge Pose backbend (Setu Bandha Sarvangasana) works the spine and chest.
- kneeling Camel Pose backbend (Ustrasana) deepens the arch from the knees.
- Cow Face Pose (Gomukhasana) opens the shoulders.
- Cobra, Upward-Facing Dog, and Dolphin build the backbend and the shoulder opening.
Once you can catch your back foot, Dancer Pose and its balance (Natarajasana) is a natural next step. It uses a similar back-foot hold while you stand on one leg.

After the pose, Yoga Journal suggests neutral shapes that let the spine settle. Downward-Facing Dog is the first, followed by these two.
- restful Child’s Pose (Balasana) gently rounds the back.
- Seated Forward Bend Pose (Paschimottanasana) stretches the hamstrings.
Who Should Avoid or Modify King Pigeon?
Most people can practice some version of Pigeon with props and patience. The National Center for Complementary and Integrative Health (NCCIH) considers yoga generally safe for healthy people. That holds when you practice properly with a qualified instructor.
The most common yoga injuries are sprains and strains, most often in the knee or lower leg. That is one more reason to set up the front knee with care. NCCIH lists these conditions as ones that may call for modified poses.
- Knee or hip injuries: try the reclined figure four instead of the full pose.
- Lumbar spine disease: skip the deep backbend and keep the chest upright.
- Balance issues: stay low and use props for support.
- Severe high blood pressure or glaucoma: talk with your doctor before deep backbends.
- Pregnancy: ask your health care provider how to adapt your practice.
This article is for general education, not medical advice. If you have an injury, recent surgery, or a health condition, check with a licensed health professional first.
A good teacher can adjust the pose to your body in real time. Our guide to becoming a yoga instructor shows the training qualified teachers complete. A physical therapist can also help with an injury.
Sources
- YJ Editors. "One-Legged King Pigeon Pose: How to Practice Eka Pada Rajakapotasana." Yoga Journal, 24 Mar. 2025, https://www.yogajournal.com/poses/one-legged-king-pigeon-pose/. Accessed 1 Oct. 2026.
- YJ Editors. "One-Legged King Pigeon Pose II (Eka Pada Rajakapotasana II)." Yoga Journal, 27 Mar. 2025, https://www.yogajournal.com/poses/one-legged-king-pigeon-pose-ii/. Accessed 1 Oct. 2026.
- Schumacher, John. "Eka Pada Rajakapotasana (One-Legged King Pigeon Pose)." Yoga Journal, 15 Jan. 2025, https://www.yogajournal.com/practice/yoga-sequences/eka-pada-rajakapotasana-one-legged-king-pigeon-pose/. Accessed 1 Oct. 2026.
- Budig, Kathryn. "Challenge Pose: Eka Pada Raja Kapotasana." Yoga Journal, 23 Jan. 2011, https://www.yogajournal.com/poses/challenge-pose-eka-pada-raja-kapotasana/. Accessed 1 Oct. 2026.
- Crandell, Jason. "Pigeon Pose or Eka Pada Rajakapotasana: All You Need to Know." Jason Crandell Yoga Method, 27 June 2016, https://jasonyoga.com/2016/06/27/eka-pada-rajakapotasana/. Accessed 1 Oct. 2026.
- "Yoga: Effectiveness and Safety." National Center for Complementary and Integrative Health, National Institutes of Health, https://www.nccih.nih.gov/health/yoga-effectiveness-and-safety. Accessed 1 Oct. 2026.
Summarize with AI:
Did you like this article? Leave a rating!

 Loading...


